• How to Create a Budget
  • How To Get Out Of Debt
  • How to Use Coupons
    • Facebook
    • Instagram
    • Pinterest
    • Twitter
    • YouTube

Penny Pinchin' Mom

  • About
    • FAQs
    • Speaker
  • Money
    • Budget
    • Couponing Tips
    • Financial Reboot Course
    • Getting Out of Debt
    • Money Saving Articles
    • Retirement/Investing
  • Recipes & DIY
    • DIY
    • Recipes >>
      • Appetizers
      • Beverages
      • Breakfast
      • Desserts
      • Entrees
      • Lunch
      • Kid Friendly
      • Side Dishes
  • Life & Family
    • Helpful Tips and Ideas
    • Organized Life
    • Parenting
    • Printables
    • Kids
  • Coupons & Deals
    • In-Store Deals
    • Free Kindle Books
    • On Line Deals
  • Contact
    • Advertising / Media
  • Shop

Christmas Fruit Tree

This post may contain affiliate links. Please see my full disclosure policy for details.

November 17, 2016

17 Nov
Pin3K
Share99
Tweet
+1
3K Shares

A Christmas fruit tree is a fun way to add something healthy to your holiday feast.

Christmas Fruit Tree


When the holidays roll around. I love making my food look as good as it tastes! I love baking with my kids, and making cookies, and sweet treats, but I also love when I can make something pretty out of healthy foods too.

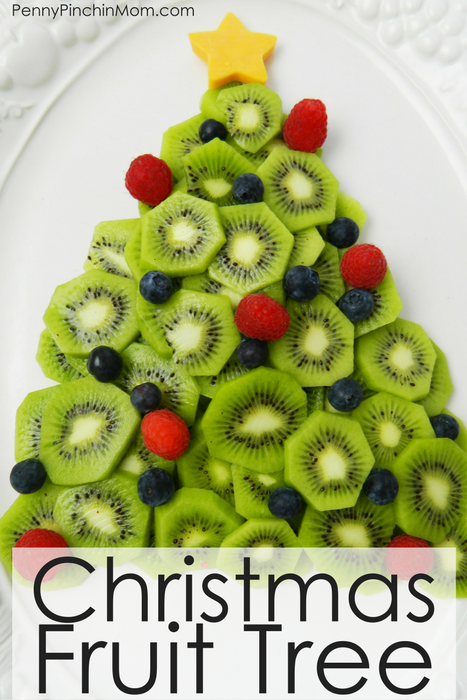
It’s nice to have some healthy food break up all of the sugar that surrounds the holidays. This Christmas Fruit Tree is perfect for any get together, or holiday party, and it’s so easy to make!

Make sure you check out some of our other awesome holiday treats:

  • Peppermint Vanilla Cupcakes
  • Gingerbread Snowflake Cookies
  • Candy Sled Placesavers

SUPPLIES

7-9 kiwi
Cheddar cheese
Blueberries
Raspberries
Small star cookie cutter
Large platter

DIRECTIONS

Peel and slice your kiwis. As you do so, place them on the platter, forming the shape of a tree.  Start at the bottom and work your way towards the top.  Try to make each layer at least 3 – 4 kiwi deep. Next, place blueberries and raspberries  “ornaments” on your tree.

Don’t forget the star!! Use a small star cookie cutter, and cut out a star shape from a slice of cheddar cheese. If you have a different type of block cheese on hand, you can just use it to help keep the cost of the dish down.

Once you’re finished arranging your platter just how you want it, you’re finished! You can serve immediately, or wrap with saran wrap or Glad Press N Seal and place in the fridge until you’re ready to serve! This is one treat that you won’t have leftovers from!

Pin3K
Share99
Tweet
+1
3K Shares
« 5 Quart Professional Mixer for $199.99 Shipped!
Kids Nature Made Gummies Only $4.45 at Target »
Tracie Fobes, Owner
I'm Tracie! Several years ago, my husband and I found a way to work ourselves out of more than $35,000 in debt. As a result of our journey, we now help families learn to do the same. I share my tips on life, family and finances - to help others achieve this same goal of living a debt free life! Learn more about me and my family HERE.
Privacy Policy | Disclosure Policy | Disclaimer

Copyright © 2009 - 2018 Penny Pinchin' Mom Media, LLC · All Rights Reserved

Site design by Olive & Ivy Design

Coupon Blog Technical Support provided by Lucky Dad Media LLC