Sometimes you JUST need a last minute Christmas shirt. If you have some cute ribbon scraps, and a well-fitting shirt, you can make one easily, without sewing!
This shirt took me less than ten minutes to throw together, and only a couple of hours for the glue to dry, and it turned out so cute! It is the perfect way to give your child a holiday shirt to wear to school (especially when you forgot to shop for one).
Check out some of these other fun Christmas ideas:
HOW TO MAKE A HOLIDAY RIBBON TREE SHIRT
SUPPLIES
Shirt
Apparel adhesive
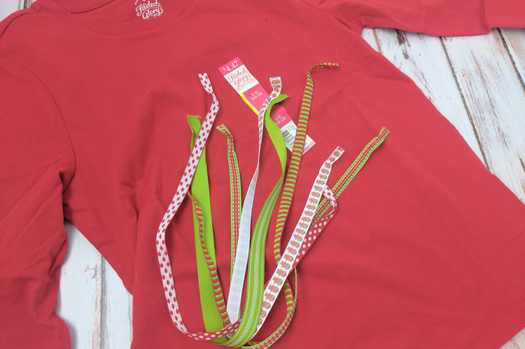
Ribbon scraps
Piece of Cardboard
Straight pins
Star jewel
Lie the shirt flat. Insert a piece of cardboard inside the shirt, to keep the glue from going through to the other side of the shirt.
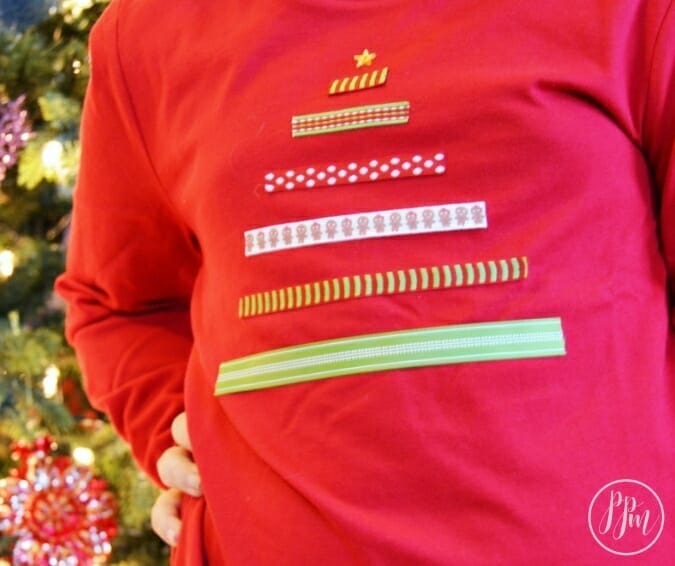
Measure your longest piece of ribbon first, for the bottom of the tree (the size is totally up to you, and depends on what size shirt you’re putting it on!). Cut it to length and lie it on the shirt (do not yet adhere i).
Cut the other ribbons to the right length as well. I shortened the length of each subsequent ribbon by 2″-3″ so give it the Christmas tree look.
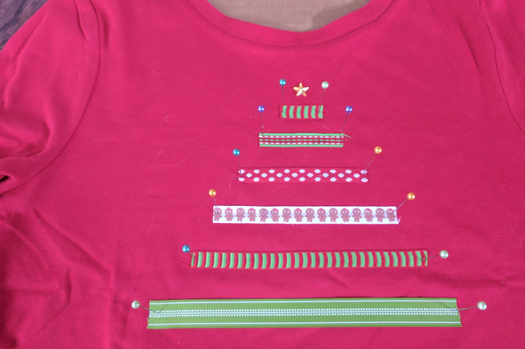
After you have all your ribbon cut, you’re ready to glue it to the shirt. Start with the star. Adhere it so that it is centered towards the top of the shirt. This will make it much simpler to line up the rest of the items for your tree.
Work your way down from the star starting with the shortest ribbon scrap, down to the longest. Run a long bead of glue down the center of each ribbon scrap. Press it onto the shirt, and then pin each end into the shirt, through the cardboard, to hold it in place while it dries. If you want to keep your ribbon from fraying, use a lighter to just slightly melt the ends of each ribbon to seal them. Allow the glue to dry for a couple of hours, or overnight.
When dry, remove the pins, and then remove the cardboard. Make sure all your pieces are securely attached, and if they are you’re ready to wear (if not, just repeat the gluing process until well secured).
It’s so simple, you don’t need to be crafty to do it! And, here’s a savings tip: Target’s one spot is a great place to get cheap, colorful ribbon at Christmas.
- Get more cute craft ideas: How to Do Christmas on a Budget
