I love when something super adorable turns out to be equally easy and cheap to make yourself! That’s the what you will find when you learn how to make tulle pom poms!!!

Making your own pom poms is not only fun, but they are really simple and affordable. In fact, you can create them for as little as $0.50 each.
What I love with this project is that you can make large pom poms or smaller ones. When you make different sizes, they are the perfect way to decorate a bridal or baby shower or even attach to birthday presents.
They take no time at all to make, and tulle is super cheap! They are also very affordable – around $0.50 each! And, using a form ensures they are all the same size, so no measuring required!!
HOW TO MAKE TULLE POM POMS
Supplies
Roll of tulle
Piece of cardboard (as large as you want your pom0pom or larger)
Fishing line or clear thread
Scissors
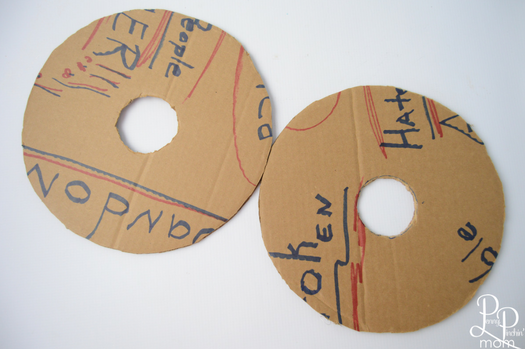
Make your cardboard forms. You can trace a bowl to end up with a perfect circle. Just use one that is the size of the pom-pom you want to create. The smaller the bowl, the smaller yours will be. Then, find the center of the circle and cut out another smaller one.
One thing to keep in mind when the center circle is the larger the center hole, the smaller the pom-pom.
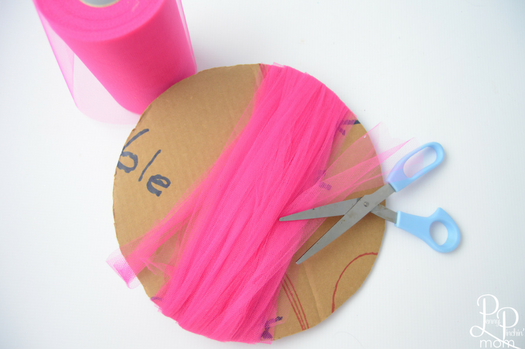
Wrap the tulle around the center of the circle (as shown above). To start, line up the tulle with the edge of the circle and then end it at the same place. That ensures that the entire pom stays even.
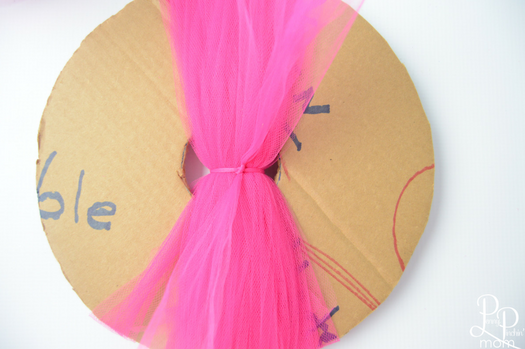
Cut another piece of tulle that’s around 8″-10″ long. Place it through the center hole and tie it tightly around the pom-pom (see image above). Make sure you tie it very tightly to ensure you have a fluffy pom-pom.
Tip: If you want to hang the pom-pom, I suggest typing on the clear string or fishing line to the piece of tulle you tied the center of the pom-pom with before cutting the edges.
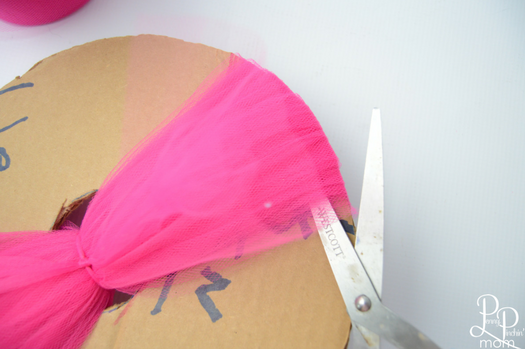
Cut through the tulle on both sides along the circle’s edges. Then, pull it through the center hole. Fluff your pom-pom and you are done!
Make different size forms to create fun dimension in your pom-poms, or make them all exactly the same size by using the same size form! The possibilities are endless!
